Shrimp and fish pond HDPE liner: how to install it and what it costs
How to install an HDPE pond liner for shrimp and fish ponds, and what drives the price — thickness (down to 500 micron), pond area, welding and accessories — so you can budget and quote it right.
Why line the pond at all
An HDPE pond liner stops seepage, keeps the water clean, makes the bottom easy to siphon and harvest, and cuts disease carry-over between cycles — which is why most modern shrimp and fish farms have left earthen ponds behind. A geomembrane for an aquaculture pond has to be anti-UV grade, because the slopes sit in direct sun for years; a non-UV sheet goes brittle and cracks at the waterline first.
Choosing thickness
On a prepared bed, 0.5–0.75 mm (500–750 micron) anti-UV HDPE is the usual call for shrimp and fish ponds; the 500 micron sheet is the one most farmers price first. Move to 1.0 mm for larger reservoirs, rough bases or heavy aeration that drags the liner around. A thicker sheet takes puncture and footfall better but costs more per m² — match it to your pond, not the heaviest roll on the shelf.
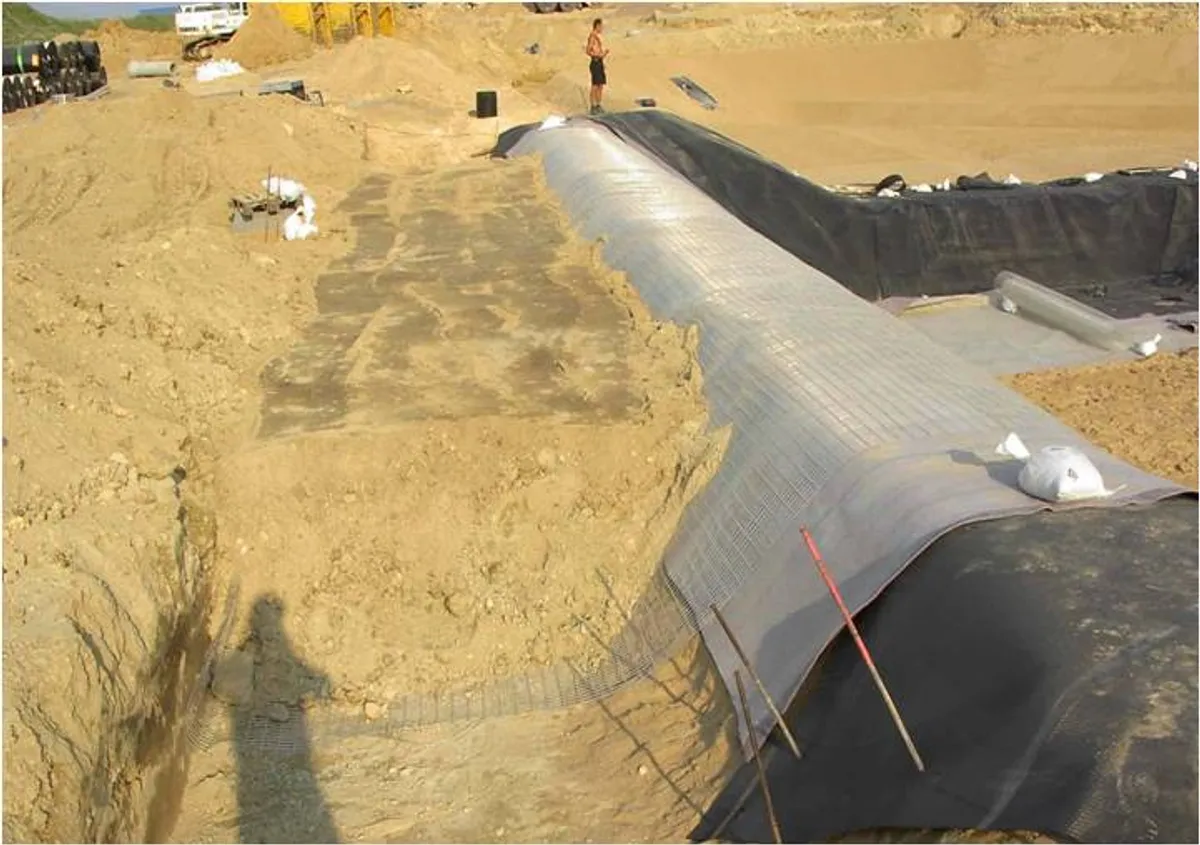
How to install a pond liner, step by step
The sequence is the same whether you are lining a square pond, a round one or a large reservoir. Grade and compact the bed and slopes, pulling out sharp stones. Roll out the sheets, then weld panels: a hot-wedge welding machine for the long seams, an extrusion welder for corners, patches and pipe penetrations. To fit a pond liner into corners and a square pond without bridging, fold the slack into neat pleats at the angles rather than stretching the sheet drum-tight. Where a pipe passes through, cut a tight collar and extrusion-weld a boot around it — that penetration is the leak most people miss. Anchor the liner edge in a perimeter trench at the top of the embankment and backfill it so wind can't lift the sheet. Test every seam — air-pressure on the dual-wedge track, vacuum box on extrusion welds — before you put water in. A virtual weld that looks fine and leaks is the classic post-fill failure.
What drives the price
Liner cost rides on thickness, total area (bed + slopes + anchor trench — add roughly 10–15% over the flat footprint), welding labour, and accessories: weld rod, pipe boots, the welding machine. A bare per-m² 500 micron pond liner price is only half the budget; the welding and trench work is the other half. Send pond dimensions, depth and slope and we price the sheet, welding consumables and accessories together as one package.
Free Geosynthetics Spec & Selection Guide
Material grades, thickness/GSM sizing and price ranges for your project — sent to your inbox.
Frequently asked questions
What thickness HDPE liner is best for a shrimp pond?
0.5–0.75 mm (500–750 micron) anti-UV HDPE for a normal shrimp or fish pond on a prepared bed; step up to 1.0 mm for larger ponds, rough subgrades or strong aeration.
How much extra liner area should I order over the pond footprint?
Add roughly 10–15% over the flat footprint to cover slopes, the anchor trench and weld overlaps.
How do you build a pond with a liner?
Excavate and shape the pond, grade and compact the bed and slopes stone-free, then lay the liner in from the deepest point outward, weld the panels, and anchor the edge in a perimeter trench before backfilling. Fill slowly so the liner settles into the contours as the water rises.
How do you lay a pond liner in a large pond?
Position the rolls along the longest run, unroll over the prepared bed, and weld panel to panel with a hot-wedge machine; on a large pond plan the seam layout first so welds run downhill, not across the flow, and keep plant off the bare sheet.
How deep should the anchor trench be?
A typical geomembrane anchor trench is around 0.5 m wide and 0.5 m deep, set back from the crest, with the liner run in, down and back along the base before backfill. The exact anchor trench design comes off the slope angle and the uplift the wind and water exert — steeper or windier sites call for a deeper key.
Related product
View HDPE GeomembraneNeed a quote or a spec check?
Tell us your application and quantity — our English-speaking team replies within one business day.